Air Dry Clay Wall Hanging: A Simple Boho Mobile
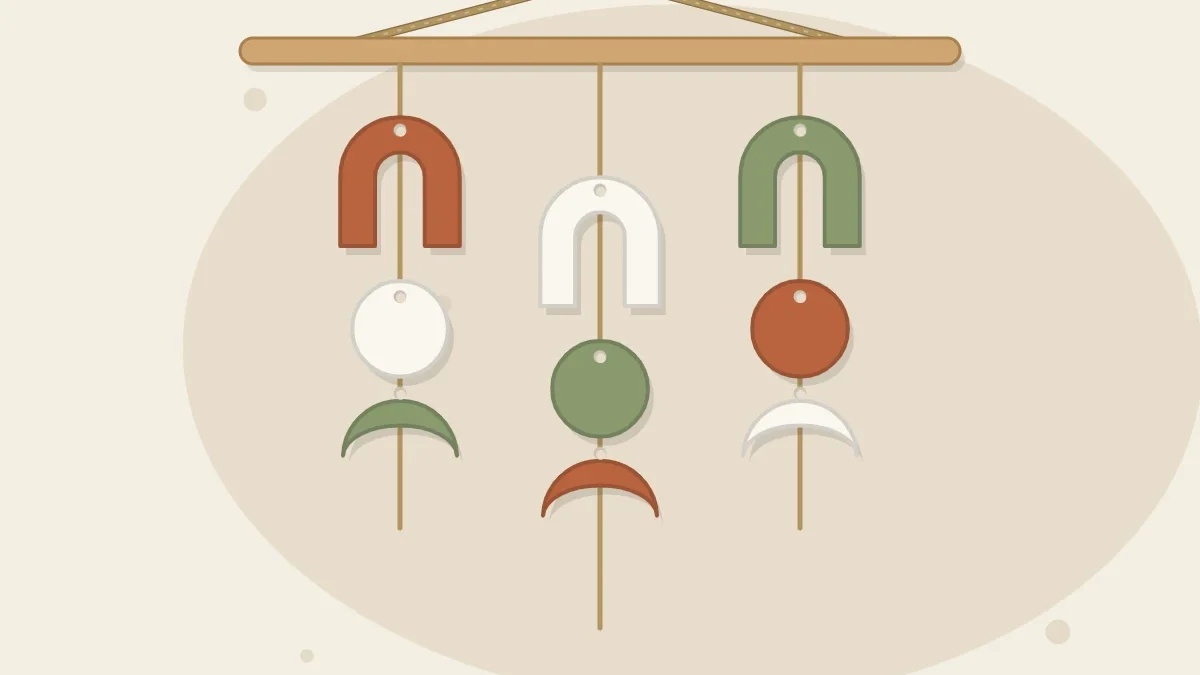
Cut arches, circles and crescents from an even clay slab, punch cord-sized holes before drying, and string three knotted strands on a wooden dowel.
Tutorial at a glance
Materials
- Air dry clay (about a tennis-ball-sized lump)
- Rolling pin and 1/4 inch (6 mm) guide sticks
- Round cutters or a glass and jar lid
- Craft knife
- Drinking straw
- Fine sandpaper
- Twine or cotton cord
- Wooden dowel or dry branch
A clay wall hanging is mostly a planning job. The flat cut-outs take minutes to make; what decides whether the finished mobile looks balanced is the layout, where the holes sit and how light each piece is. This version hangs three strands of arches, circles and crescents from a wooden dowel.
What You Need
- Air dry clay, roughly a tennis-ball-sized lump
- Rolling pin and two guide sticks about 1/4 inch (6 mm) thick
- Round cutters, or a glass and a jar lid, in two sizes
- Craft knife (an adult should handle or supervise the blade)
- Drinking straw for the holes
- Parchment paper or a canvas mat to work on
- Fine sandpaper
- Acrylic craft paint and a water-based acrylic varnish, if you want color
- Twine or cotton cord, about 2 yards (2 m)
- A wooden dowel or a clean, dry branch, 10 to 12 inches (25 to 30 cm) long
Plan the Layout Before You Touch the Clay
Draw the hanging at full size on paper. Three columns of three or four pieces each is a comfortable first design. Making the middle strand one piece longer than the outer two gives a pointed outline. Alternate shapes down each column so no two neighbors match, and repeat each shape at least twice so the design reads as a pattern.

The sketch also shows how many holes each piece needs, a detail often forgotten until the clay is hard.
| Shape | Suggested size | Holes | Where it works best |
|---|---|---|---|
| Circle | 1 1/2 to 2 inches (4 to 5 cm) across | Top and bottom | Anywhere in a strand |
| Crescent | About 2 inches (5 cm) tall | One near each tip | Middle of a strand, hanging like a letter C |
| Arch | About 2 1/2 inches (6 cm) wide | One at the top of the curve | End of a strand |
| Any last piece | Your choice | Top only | Bottom of each strand |
Roll and Cut the Pieces
- Knead the clay for a minute, then roll it between the guide sticks to an even 1/4 inch (6 mm) or so. Even thickness matters because uneven pieces dry at different speeds and hang at different weights; the guide on rolling an even slab covers the method.
- Cut the circles first. Press the cutter straight down, give it a tiny wiggle, and lift.
- For a crescent, cut a circle, then move the same cutter partly over it and cut again to take a bite out of one side.
- For an arch, cut a larger circle and slice it in half with the knife. Then use a smaller cutter on the straight edge to remove a half-circle, leaving a rainbow shape. Keep the band at least 1/2 inch (12 mm) wide so it does not snap.
- Run a barely damp fingertip around every cut edge to soften it. More detail on tidy edges is in the tutorial on cutting air dry clay cleanly.
- Arrange the pieces on your sketch to check the design, and cut one or two spares in case something breaks.
Make the Holes Larger Than You Think
Punch every hole now, while the clay is soft. Push the straw straight through, twist and lift; the plug of clay comes out with it. A standard straw leaves a hole close to 1/4 inch (6 mm) wide, which suits most twine. Clay and its holes shrink a little in drying, so a hole that only just fits the cord now may be too tight later.
Keep each hole at least 1/4 inch (6 mm) in from the edge; a thinner bridge of clay is the first place to chip.
Tip
Fold your cord in half and push the doubled end through a wet hole. If the doubled cord fits, a single strand should still pass easily once the piece has dried.
Dry the Pieces Flat and Turn Them
Slide the parchment onto a tray or move the pieces to a wire rack, and leave them at room temperature away from direct sun and strong drafts. Flat pieces dry faster on the exposed side, which pulls the edges upward. Turning each piece over every few hours on the first day, and morning and evening after that, helps both faces dry at a similar pace and reduces the risk of curling.
Pieces this thin are often dry in one to three days, but humidity, airflow and the clay itself all change that, so go by the instructions on your clay’s package and by how the pieces look and feel. The signs are explained in the article on how long air dry clay takes to dry. Do not hurry the process with heat; slow, even drying usually gives flatter results.
Sand, Then Paint or Leave Natural
Once fully dry, smooth any rough edges with fine sandpaper. Sanding makes fine dust, so do it outdoors or in a well-ventilated spot and wipe the pieces and the table with a damp cloth afterward.
Bare clay in bone white looks good on its own, and a mix of painted and unpainted pieces works well. Terracotta, white and sage is an easy palette. Use thin coats of acrylic craft paint and let each coat dry; the basics are in the guide to painting air dry clay. A coat of water-based acrylic varnish on both faces adds some resistance to dust and handling. It is water-resistant at best, not waterproof.
String the Strands
- Cut three cords, each about twice the planned strand length plus 8 inches (20 cm) for knots.
- Tie one end of each cord to the dowel with a double knot, spacing them evenly.
- Tie an overhand knot where the first piece should sit, then thread the piece on from the bottom of the cord so its top hole rests on the knot. If the hole is wide, tie a second knot on top of the first.
- For a piece with two holes, run the cord down the back, bring it forward through the lower hole, and knot again just beneath it. The cord behind keeps the piece facing forward.
- Leave about 1 inch (2.5 cm) of bare cord, tie the next knot and repeat.
- Finish each strand with a firm knot under the last piece and trim the tail, or fray it into a small tuft.
- Tie a separate length of cord to both ends of the dowel as the hanger.

Hang It Somewhere Dry
A hanging this size is light enough for a small nail or hook. Choose an indoor wall in a dry room, away from heat sources and never in a bathroom or beside a kitchen stove, where steam collects: ordinary air dry clay softens with prolonged moisture even when sealed.
Watch out
Dried clay is brittle and can chip or break if it falls, and cords and small pieces are not for young children. Hang it where it will not be knocked, never above a bed or crib or within a child’s reach.
To clean it, use a soft dry brush or a dry cloth. Skip wet wipes and sprays.
Frequently asked questions
How thick should the pieces of a clay wall hanging be?
About 1/4 inch (6 mm) is a good middle ground. Thinner pieces curl and snap more easily, while thicker ones add weight and take longer to dry.
Can I make the holes after the clay has dried?
It is much easier and safer to make them while the clay is soft. Drilling dry clay risks cracking the piece, especially near an edge.
Can I hang a clay wall hanging in a bathroom?
It is better not to. Steam and damp air can soften ordinary air dry clay over time, and sealing adds only some resistance to light moisture.
Why did my flat pieces curl while drying?
The top face usually dries faster than the face against the table, which pulls the edges up. Turning the pieces regularly and drying them away from sun and drafts reduces the risk.