How to Roll Air Dry Clay into an Even Slab
Roll a flat, even slab of air dry clay using a non-stick surface, two guide sticks and a center-out rolling pattern, with thickness ranges for common projects.
Tutorial at a glance
Materials
- Air dry clay (about a tennis-ball-sized lump for a practice slab)
- Smooth rolling pin or acrylic roller kept for crafts only
- Canvas, parchment paper or silicone mat
- Two guide sticks about 1/4 inch (6 mm) thick
- Small cup of water and a soft sponge
- Toothpick or needle tool
- Flat board or tray
Most flat clay projects succeed or fail at the rolling stage. A slab that is thicker on one side than the other dries unevenly, and uneven drying is a common cause of the curling and cracking beginners run into. An even slab depends far more on setup than on skill: the right surface, two guide sticks and a rolling pattern that works from the middle outward.
What You Need
- Air dry clay, a lump roughly the size of a tennis ball for a practice slab
- A smooth rolling pin or acrylic roller with no ridges, kept for crafts only and not returned to the kitchen
- A non-stick surface: canvas, parchment paper or a silicone mat
- Two guide sticks of equal thickness, about 1/4 inch (6 mm)
- A small cup of water and a soft sponge
- A toothpick or needle tool for air bubbles
- A flat board or tray for moving the slab
If you are still gathering supplies, the list of air dry clay tools includes household stand-ins for the roller and the guides.
Choose a Surface That Does Not Stick
Clay rolled directly on a bare table tends to grip it. When you then peel the slab up, it stretches and distorts, and all the careful rolling is lost. Three surfaces work well:
| Surface | Advantages | Things to know |
|---|---|---|
| Canvas or heavy cotton | Releases clay easily and absorbs a little surface moisture | Leaves a faint fabric texture on the underside |
| Parchment paper | Smooth, and lets you lift the slab on the sheet | Can wrinkle when damp; tape the corners down |
| Silicone craft mat | Very smooth, stays put, wipes clean | Soft or sticky clay may cling to it slightly |
Whichever you choose, make sure it is clean and dry. Crumbs of old clay press into a fresh slab and leave pits.
Step-by-Step: Rolling an Even Slab
- Condition the clay. Knead the lump for about 30 to 60 seconds, pressing it flat with the heel of your hand and folding it over. Stop once it feels uniform and pliable. Long kneading only dries it out.
- Shape a thick patty. Pat the clay into a rounded disc or a brick, about 1 inch (2.5 cm) thick, in roughly the shape you want the slab to end up. A round patty rolls into a round slab; a rectangle rolls into a rectangle.
- Press it down by hand. Flatten the patty with your palm to about twice the final thickness. This saves rolling and pushes out some trapped air.
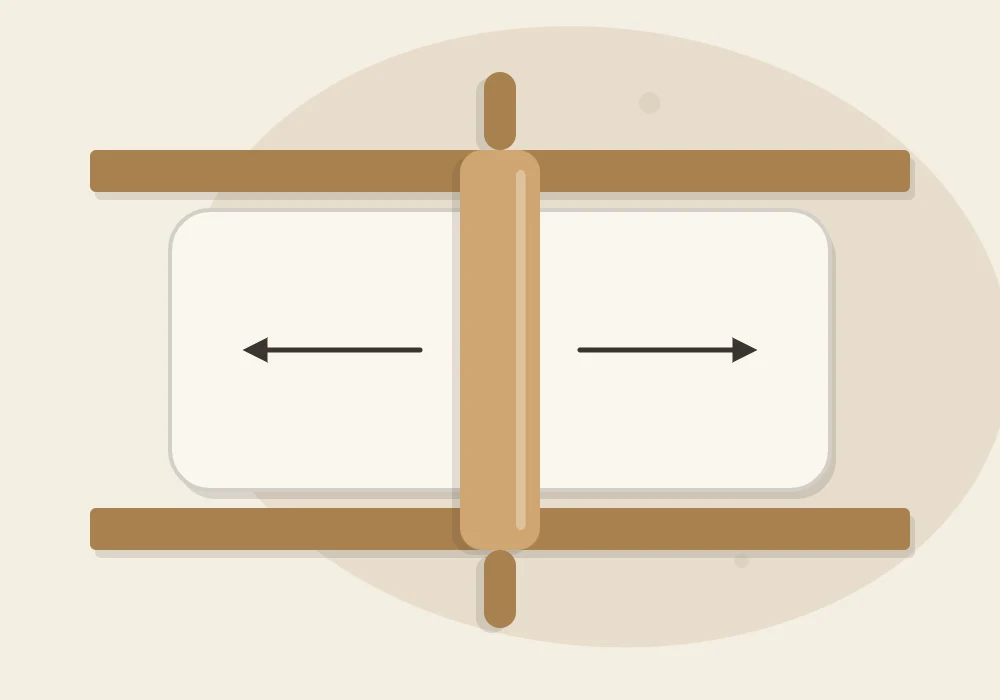
- Set the guide sticks. Place one stick on each side of the clay, parallel to each other and close enough that both ends of the roller rest on them.
- Roll from the center outward. Put the roller in the middle of the clay and roll away from you, then return to the middle and roll toward you. Use light, even pressure over several passes.
- Turn the slab. After every two or three passes, lift the clay gently and rotate it a quarter turn. Flip it over once or twice as well. Turning keeps the slab from sticking and spreads the clay evenly.
- Finish on the guides. Keep rolling until the pin rides on both sticks along its whole length and no longer presses the clay any thinner.
- Check the surface. Look across the slab at a low angle. Smooth small marks with a barely damp fingertip or one gentle pass of the roller.
Tip
No guide sticks at hand? Two matching rulers, paint stirrers or equal stacks of craft sticks taped together do the same job. Only the matching height matters.
How Thick Should the Slab Be?
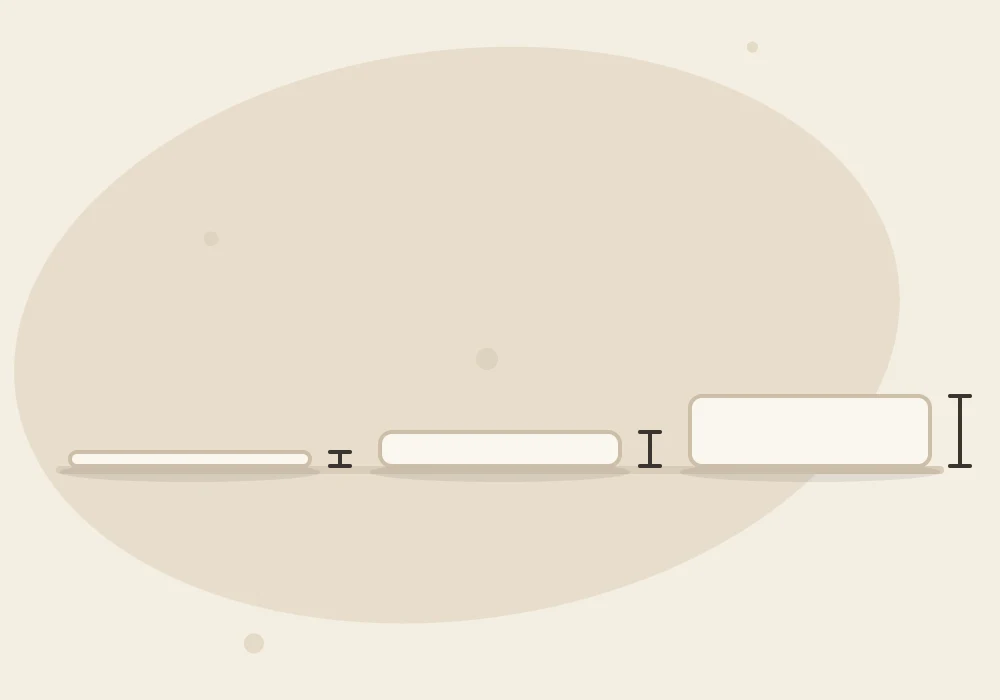
Thinner is not better with air dry clay. Very thin slabs are more likely to curl as they dry and are fragile once hard, while very thick ones take a long time to dry through. These ranges are general starting points; check your clay’s package, since some clays need a little more thickness to stay strong.
| Project | Typical thickness | Why |
|---|---|---|
| Gift tags and small charms | About 1/8 to 3/16 inch (3 to 5 mm) | Light enough to hang, thick enough to resist snapping |
| Hanging ornaments | About 3/16 to 1/4 inch (5 to 6 mm) | Holds a hanging hole without tearing |
| Trinket dishes and trays | About 1/4 inch (6 mm) | Keeps its curve and takes light sanding |
| Larger flat pieces | About 1/4 to 3/8 inch (6 to 10 mm) | Extra thickness helps a wide slab stay flat |
Avoiding Air Pockets and Sticking
Air trapped inside a slab shows up as a small raised blister. Pockets are weak spots and can open into holes when you sand. To deal with them:
- Prick the blister at a low angle with a toothpick or needle tool.
- Press the air out toward the hole with a fingertip.
- Roll over the spot once to close it.
Folding clay over on itself while kneading is what traps most air, so press folds down firmly from one side to the other instead of slapping them shut.
If the clay sticks to the roller, it is usually too wet or too warm. Let the slab sit uncovered for a few minutes, wipe the roller dry, and try again. A sheet of parchment laid over the clay also keeps the roller clean, though it can leave fine creases.
Watch out
Do not wet the slab to make it roll more easily. Extra water makes the surface slimy, weakens the clay and raises the risk of cracks as it dries.
Lifting a Slab Without Stretching It
A soft slab picked up by one edge sags under its own weight, and the stretched area ends up thinner than the rest. Use one of these methods instead:
- Move the surface, not the clay. If you rolled on parchment or canvas, slide a board under the sheet and carry both together.
- Flip it between two boards. Lay a second board on top, turn the whole stack over and peel the mat off the back.
- Support it with flat hands. For small pieces, slide spread fingers underneath and lift from the middle.
Where possible, cut your shapes while the slab is still on its rolling surface and move only the cut pieces. The guide on cutting air dry clay cleanly picks up from this point.
What to Do Next
A fresh slab is at its softest in the first few minutes. That is the best moment to press in patterns, which is covered in adding texture to air dry clay. For crisp cut edges, let the slab rest for about 10 to 15 minutes first so it firms up slightly.
Press the offcuts into a ball and wrap them in plastic right away so they can be rolled again. Dry cut shapes slowly at room temperature and turn them from time to time. Even rolling reduces the risk of warping, though it cannot rule it out, and the guide to reducing the risk of air dry clay cracks covers the drying side of the job.
Frequently asked questions
Why does my clay slab crack at the edges when I roll it?
The clay is usually a little too dry or was not kneaded enough. Knead it briefly with slightly damp hands, press the edges back together with your fingers and roll with lighter pressure.
Can I roll air dry clay without guide sticks?
Yes, but it is harder to keep the thickness even. Roll in several light passes, turn the slab often and check it from the side at table level to spot thick and thin areas.
Should I dust the surface with flour or cornstarch?
It is usually not needed on canvas, parchment or silicone. If the clay still sticks, a very light dusting of cornstarch on the roller can help; brush off any excess before the clay dries, and keep that roller for crafts only, not for food.
How long can a rolled slab sit before I cut it?
Ten to fifteen minutes of resting often gives cleaner cuts. Much longer than that and the edges start to dry, so cover the slab loosely with plastic wrap if you need to step away.